Raspberry Pi Projects You Can Run with Amarok Linux
Raspberry Pi projects are nothing short of a playground for curious minds. When you pair a Raspberry Pi with Amarok Linux, you unlock a lightweight yet powerful environment that emphasizes security, simplicity, and potential. Here on AmarokLinux.org we believe that technology should amplify your ideas, not complicate them. In this article we dive into a broad range of Raspberry Pi projects you can run with Amarok Linux, from retro gaming and media centers to home automation and portable workstations. Whether you are a teacher, maker, student, or IT tinkerer, you will find ideas that fit your skill level and budget. This is part of our News and Updates coverage, designed to keep you informed about the latest happenings in Amarok Linux and how they apply to your Raspberry Pi journey.
Why Amarok Linux on Raspberry Pi matters
Amarok Linux is designed to be approachable yet powerful. Running Amarok Linux on a Raspberry Pi gives you a familiar, cohesive operating system experience that is optimized for small form factor hardware. Here is why this pairing matters for your projects:
- Lightweight and efficient: Amarok Linux is optimized for performance on ARM devices, making the most of the Pi’s modest resources.
- Strong security posture: The distribution emphasizes security hardening out of the box, with ongoing updates and configurable protections.
- Consistent toolchain: You get a consistent set of development tools, media services, and system utilities that work well together.
- Portable potential: With the option to run Amarok Linux as a portable system on supported devices, your Pi projects can be carried or replicated easily.
- Active community and updates: The Amarok Linux community is committed to timely updates, security advisories, and practical guidance for Pi users.
If you are building a Pi based project for home, classroom, or workshop, Amarok Linux provides a solid foundation that reduces friction and helps you focus on what you want to accomplish.
Getting started: installing Amarok Linux on Raspberry Pi
The first step to any Pi project is getting Amarok Linux on the device. Below is a practical, step by step guide designed for beginners and seasoned users alike.
What you will need
- Raspberry Pi model 3, 4, 400, or newer
- A high quality microSD card (16 GB or larger; 32 GB or 64 GB is ideal for multiple projects)
- A reliable power supply that matches your Pi model
- HDMI monitor or TV, plus a keyboard and mouse for initial setup
- Network access (wired Ethernet or Wi Fi) for updates
- A computer to download the image and flash the card
- A case with cooling if you plan to push the Pi hard for extended periods
Optional but helpful items:
– A USB 3.0 hard drive or SSD for expanded storage
– A passive or active cooling solution for sustained workloads
– An external USB hub if you need more USB devices
Downloading and verifying the image
- Visit amaroklinux.org and navigate to the Raspberry Pi downloads section.
- Choose the correct Amarok Linux image for your Pi model.
- Download the image and verify the integrity with the provided SHA256 checksum. If a GPG signature is offered, verify it as well to ensure the image has not been altered.
- Keep a copy of the image in a safe place so you can re flash it if needed.
Flashing the image to the microSD card
- Use a reliable flashing tool such as Raspberry Pi Imager or Balena Etcher.
- Select the Amarok Linux image you downloaded and target the microSD card.
- Start the flash process and wait until it completes. Eject the card when ready.
- For best results, use a high quality microSD card with good random write performance.
First boot and initial configuration
- Insert the microSD card into your Raspberry Pi and power it up.
- During the first boot you may be prompted to set locale, time zone, and keyboard layout. Do this to match your location.
- Enable SSH if you plan to manage the Pi remotely. This makes it easier to work headless after your initial setup.
- Update the system to ensure you have the latest security patches and software:
- Open a terminal and run the update command for Amarok Linux.
- Install any recommended updates and security patches.
- Create a strong, unique password for the default user and consider creating a dedicated non root user for daily work.
Performance tuning for Raspberry Pi
To get the best experience on a Pi with Amarok Linux, consider a few performance tuning steps:
- Memory split adjustments: If you are using a Pi with a dedicated graphical interface, balance the memory split between CPU and GPU for your workload.
- Enable zram: If your Pi has limited RAM, enabling zram can dramatically improve responsiveness for heavy tasks.
- Disable unneeded services: Review running services and stop or disable ones that you do not need for your specific project.
- File system optimizations: Use a high quality microSD and consider moving frequently accessed directories to an external SSD, if available.
- Scheduler and power settings: Align power management settings with your workload to avoid unnecessary drain and heat.
- Regular updates: Keep the system up to date with security updates and bug fixes to maintain stability.
Projects: Raspberry Pi ideas you can run with Amarok Linux
Here are practical, fully fleshed out project ideas you can tackle with Amarok Linux on your Raspberry Pi. Each project includes a quick overview, the core tools you would use, and a simple step by step plan.
1. Retro gaming console and emulation station
Retro gaming sits at the heart of many Pi projects. With Amarok Linux, you can build a compact emulation station that runs classic titles from consoles like NES, SNES, Mega Drive, and more.
Core tools and setup:
– Emulation front end: RetroArch or similar front ends
– Core packages: emulators for NES, SNES, Genesis, PlayStation, and arcade systems
– Game ROMs: legal copies and backups you own
– Controllers: USB gamepads or Bluetooth controllers
– Media hub: a simple UI to browse and launch games
Step by step plan:
1) Install RetroArch and configure the supported cores
2) Connect your controllers and map buttons for comfortable play
3) Add ROMs to a dedicated directory and set up the library path
4) Create a clean home screen with shortcuts to your favorite games
5) Optional: set up a controller friendly OS image that can be used on other Pi devices
Tips:
– Keep your ROMs organized by system and use descriptive subfolders
– Back up your RetroArch configuration so you can restore settings quickly
2. Personal media server for family sharing
A media server lets you stream photos, videos, and music to any device in your network. With Amarok Linux on a Pi, you can run a compact and robust server that your family can access.
Core components:
– Jellyfin or Plex alternative: Jellyfin is a popular open source option
– Storage: external drive or network attached storage
– Client devices: smart TVs, phones, tablets, and computers
– Local network accessibility: ensure proper firewall rules to allow local access only if desired
Step by step plan:
1) Install Jellyfin or your chosen media server software
2) Point your library to your media folders and metadata sources
3) Enable remote access if you need to stream outside your home network
4) Create user accounts for family members and assign permissions
5) Install a client app on your devices and test playback
Tips:
– Use a dedicated external drive to store large media collections
– Regularly back up your metadata and libraries
– Consider a small UPS to protect the Pi and storage from power outages
3. Home automation hub
Turn your Pi into a robust home automation hub by running Home Assistant Core or a consolidated Home Assistant Supervised setup. This project ties together sensors, lights, climate controls, and more.
Core components:
– Home Assistant Core or Supervised
– Hardware integration: Zigbee, Z-Wave dongles, Wi Fi devices
– Local control: prioritize local control for privacy and speed
Step by step plan:
1) Install Home Assistant Core in a Python virtual environment or use a container if supported
2) Set up the initial configuration and add your devices
3) Create automations and scenes for lighting, climate, and security
4) Add dashboards for easy control and monitoring
5) Regularly check for updates and back up the configuration
Tips:
– Keep critical automations in a separate YAML file for easier maintenance
– Use a dedicated Zigbee/Z-Wave hub for reliability
4. Portable productivity and remote work station
Amarok Linux on a Pi can be a compact and dependable remote work station for light tasks, coding, or documentation. Pair it with a portable power source and a lightweight desktop environment.
Core components:
– Lightweight editor: Neovim, VS Code Server, or Geany
– Remote access: SSH with key authentication, VNC, or remote desktop
– Web tools: browser, office suites, and note taking apps
Step by step plan:
1) Install the desktop environment you prefer and the essential productivity apps
2) Set up SSH keys for secure remote access
3) Configure a persistent workspace on a connected drive or the microSD card
4) Create a quick start script to launch common tools
5) Use cloud storage or Nextcloud for file syncing if needed
Tips:
– Embrace keyboard shortcuts and text based workflows to speed things up
– Consider performance constraints and avoid heavy apps on Pi
5. Pi network monitor and security appliance
The Pi can be a lightweight, always-on network monitor that also blocks ads and protects your devices.
Core components:
– Pi hole for DNS level ad blocking
– Lightweight firewall rules and monitoring
– Optional intrusion detection with lightweight tools
Step by step plan:
1) Install Pi hole and configure DNS settings for your network
2) Set up a firewall with simple rules to block unwanted traffic
3) Add logging and monitoring to watch for unusual activity
4) Keep all software updated to reduce vulnerability windows
5) Create regular backups of configuration and logs
Tips:
– Place Pi hole and firewall in a dedicated network segment for better security
– Review logs weekly to catch anomalies early
6. Personal cloud and file sharing
Nextcloud or a similar self hosting storage solution makes sense for households or small teams.
Core components:
– Nextcloud server with storage backend
– Client apps on devices for sync
– Optional external storage integration if you need more space
Step by step plan:
1) Install Nextcloud and set up the admin account
2) Configure storage options and user accounts
3) Enable mobile and desktop clients for automatic syncing
4) Secure the instance with TLS, firewall rules, and regular backups
5) Create a routine for maintenance and updates
Tips:
– Use a robust password policy and two factor authentication
– Keep backups of data and metadata
7. Educational lab and STEM exploration hub
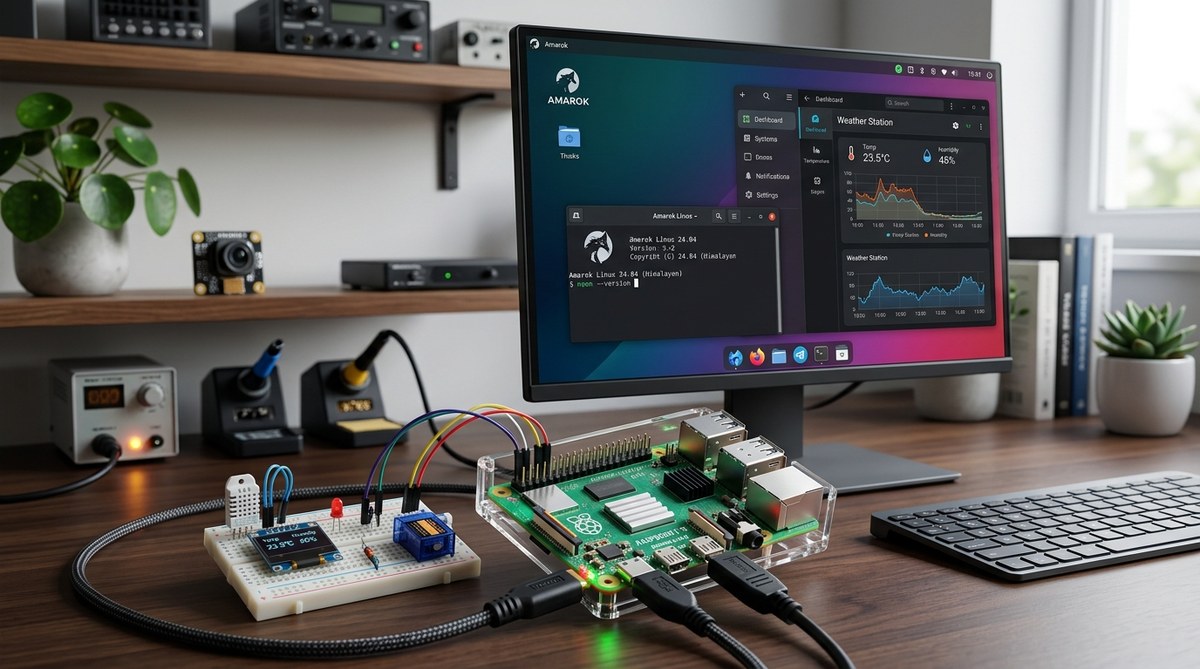
For classrooms or makerspaces, a Pi running Amarok Linux can host Jupyter notebooks, Python environments, and data logging projects.
Core components:
– JupyterLab or Jupyter Notebook
– Python and essential libraries for science and math
– Sensor devices for data collection (temperature, humidity, motion, etc.)
Step by step plan:
1) Install JupyterLab and set up a Python environment
2) Create templates for typical experiments
3) Connect sensors and collect sample data
4) Share notebooks with students and colleagues
5) Regularly update libraries and store data safely
Tips:
– Use version control for notebooks and data sets
– Create a shared drive or nextcloud for student collaboration
8. Kodi based media center
If you want a polished media experience, set up Kodi on Amarok Linux to watch multimedia content, stream from the network, or access online services.
Core components:
– Kodi as the media center frontend
– Local media library and network shares
– Optional streaming plug ins
Step by step plan:
1) Install Kodi and enable required plug ins
2) Add your media folders to the library
3) Configure remote control options and add ons
4) Customize the home screen for easy access
5) Back up configuration to avoid repeating setup
Tips:
– Keep your media organized with clear folder structures
– Regularly scan libraries for new content
9. Backup and disaster recovery server
A Pi running Amarok Linux can be your backup anchor for small networks, automatically backing up critical files to an external drive or cloud storage.
Core components:
– Rsync or Duplicati for backups
– External drive for local backups
– Cloud storage for offsite copies
Step by step plan:
1) Choose a backup strategy: local only, cloud, or hybrid
2) Install the backup tool and configure source and destination
3) Schedule regular backups and test restoration
4) Monitor backups and maintain logs
Tips:
– Keep multiple restore points for safety
– Encrypt sensitive backups to protect data
Security hardening and best practices for Pi on Amarok Linux
Security is not an afterthought, especially on devices that connect to your home network. Here are practical hardening steps you can implement on every Pi that runs Amarok Linux.
- Change the default password: The default user often has a well known password. Change it immediately after setup.
- Enable a firewall: Use a simple firewall configuration to limit access to the Pi from the network.
- SSH key authentication: Replace password based SSH with SSH keys and disable password login.
- Disable root login: Prevent direct root access; use sudo for administration.
- Regular updates: Enable automatic or frequent security updates and monitor the security advisories.
- Use a non root user for daily tasks: Create and use a regular user for day to day work.
- Network segmentation: Put your Pi devices in a separate VLAN or network segment when possible.
- Backups: Regularly back up critical data and ensure you can restore quickly.
- Monitor access: Keep an eye on login attempts and unusual activity.
If you are experimenting with multiple Pi devices, consider documenting your security settings and changes. A small changelog helps you replay configurations when you deploy a new Pi or rebuild an existing one.
Unix timestamps and log management on Amarok Linux
Logs are essential for troubleshooting and auditing. Using Unix timestamps in your logs makes it easier to correlate events across services and devices. Here are some practical tips:
- Use a consistent time zone: Set your Pi and connected services to a single time zone or use UTC for universal consistency.
- Configure logging formats: Many services support custom log formats. Enable timestamping and include essential fields such as service name, log level, and message.
- Centralized logging: If you run more than one Pi or device, consider a lightweight central log collector to aggregate logs, which makes analysis much easier.
- Automate log rotation: Prevent log files from consuming all storage by configuring log rotation with size or time based triggers.
Amarok Linux provides friendly tooling for log management, so you can enjoy a clean, auditable trail of actions great for debugging and security analysis.
Transcript tools for video edits on the Pi
For creators and educators, having transcripts can speed up video editing, captioning, and accessibility. The Raspberry Pi is a capable host for lightweight transcription tools when paired with Amarok Linux.
- Offline transcription options: Whisper.cpp, Vosk, and other lightweight speech to text engines can run on Pi hardware with reasonable performance.
- Integration with video edits: You can export transcripts for subtitles or create searchable transcripts for your footage.
- Workflow ideas:
1) Record a video and extract audio
2) Run a transcription tool to generate a transcript
3) Edit transcripts for accuracy
4) Import the corrected transcript into your video editor for captions
Tips:
– Start with shorter samples to gauge performance
– Use a dedicated USB microphone for clearer audio input
– Leverage batch processing for multiple videos to save time
By using transcript tools on the Pi, you can accelerate video editing workflows and improve accessibility for your audience.
Maintenance and updates for Pi projects
Maintenance is a quiet driver of long term success. Here is a practical maintenance checklist you can follow:
- Regular updates: Schedule updates weekly or monthly depending on your workload.
- Backups: Keep backups of important data, configuration files, and databases.
- Security reviews: Review firewall rules, SSH settings, and user permissions on a regular basis.
- Hardware checks: Inspect cooling solutions, fans, and cases to prevent overheating.
- Software audits: Remove unused software and dependencies to keep the system lean.
- Documentation: Maintain notes about your setup and project changes for future reference.
Troubleshooting common Pi Amarok Linux issues
- Wonky performance: Check CPU and memory usage, reduce background services, enable swap or zram as needed.
- Network connectivity problems: Verify network settings, DNS configuration, and firewall rules.
- SSH connection problems: Confirm SSH is enabled, keys are configured properly, and the port is open.
- Storage space: Clear old logs, large caches, and move infrequently used data to external storage.
- Software conflicts: Revisit recently installed packages and consider rolling back updates if issues arise.
Conclusion: unlock the full potential of your Raspberry Pi with Amarok Linux
The Raspberry Pi is a remarkably capable platform, and when paired with Amarok Linux it delivers a streamlined, secure, and flexible environment for a wide range of projects. Whether you are building a retro gaming station, a personal media server, a home automation hub, or a compact portable workstation, Amarok Linux provides the tools, consistency, and community support you need to bring your ideas to life.
As you explore these ideas, remember the Amarok Linux mission: Simplify Your Experience, Amplify Your Potential. The Pi is your canvas, and Amarok Linux is your toolkit. Stay tuned to amaroklinux.org for more News and Updates, practical tips, and fresh project ideas that help you push the boundaries of what your Raspberry Pi can do. If you have your own Pi project running Amarok Linux, share your story in the comments or in our community forums so others can learn from your experience.